OCS 2007 Installation – Part 3
Other parts in this series:
This should be a short post, we’ll just be finishing up the installation so you can start some OCS 2007 testing internally. I purposely chose a different internal and external domain like many companies will do so that you can see how you have to use a "split-brain" DNS model. The split part simply means that you need to have a zone defined internally that matches your external SIP domain, which is also likely to be your e-mail domain.
Configure Internal DNS
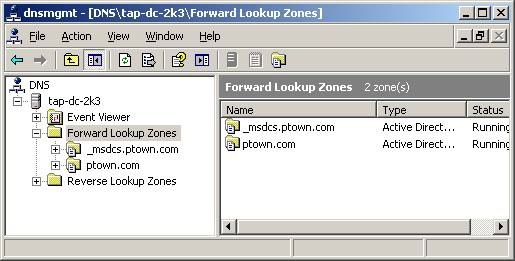
Open the DNS management tool and expand the Forward Lookup Zones folder.
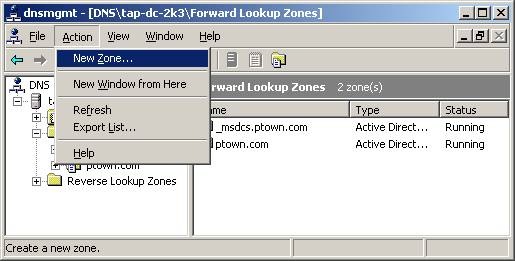
In the file menu choose Action and then New Zone.
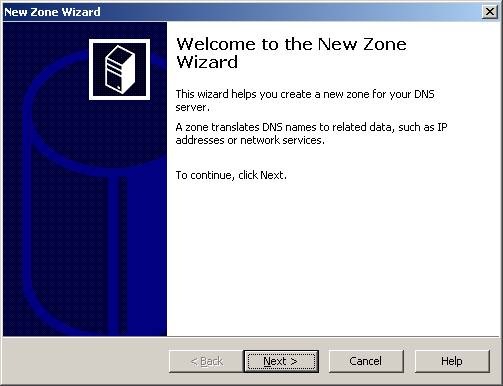
The New Zone Wizard should open. Press Next to continue.
Choose Primary zone and check the box Store the zone in Active Directory. Press Next.
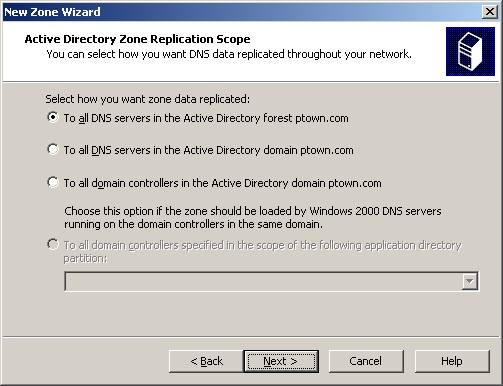
Choose To all DNS servers in the Active Directory forest ptown.com and press Next.
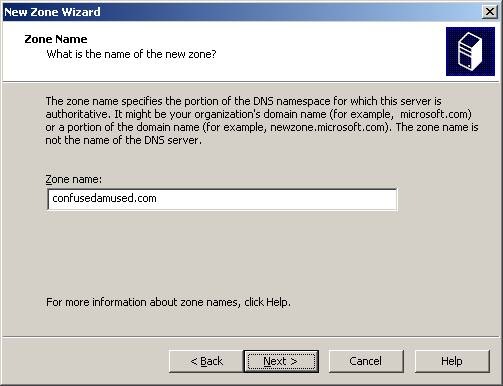
Enter the external domain name, confusedamused.com and press Next.
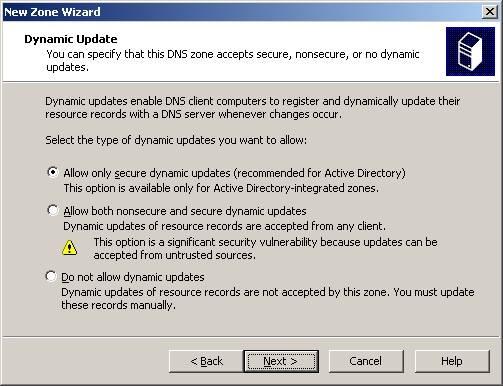
Choose Allow only secure dynamic updates and press Next.
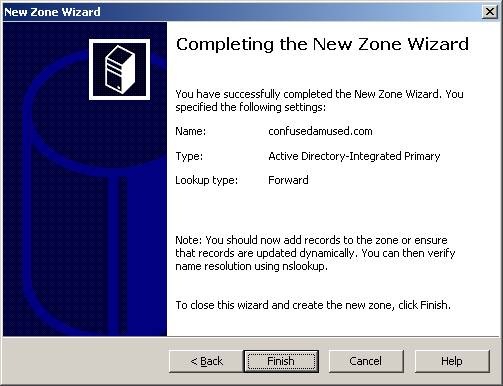
Press Finish to complete the wizard.
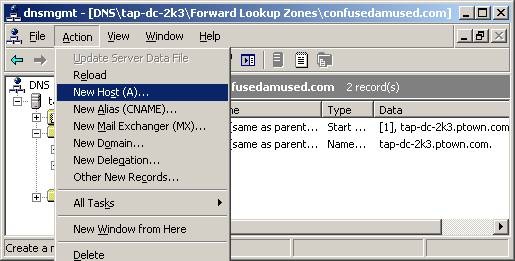
Now click once on the new zone, confusedamused.com, then in the file menu choose Action and then New Host (A).
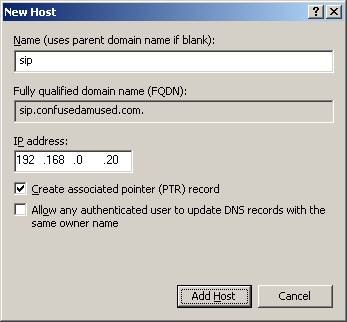
Enter sip as the hostname, verify that sip.confusedamused.com is the fully qualified domain name (FQDN), enter the IP address of the OCS box, 192.168.0.20, and check the box Create associated (PTR) record. Press Add Host.
Press OK and then Done to exit.
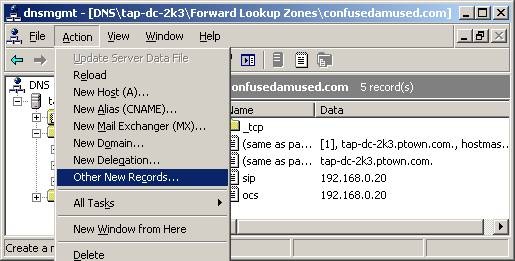
In the file menu click the Action item and choose Other New Records.
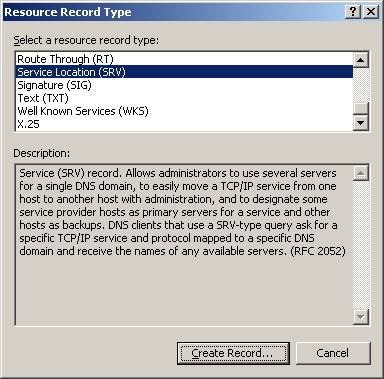
Choose Service Location (SRV) and press Create Record.
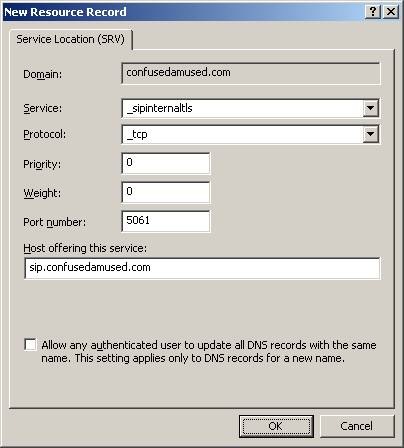
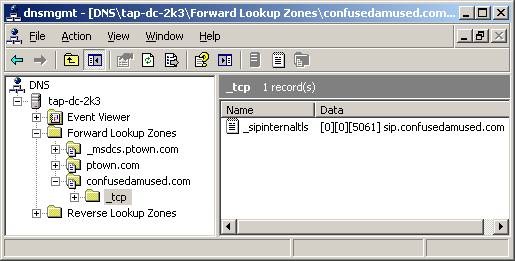
Enter the service as _sipinternaltls, change the port number to 5061 and enter sip.confusedamused.com as the host offering the service. Leave the defaults for everything else and press OK.
A record for _sipinternaltls should now exist, pointing to sip.confusedamused.com. Close the DNS management console.
The only thing left to do at this point is enable some users to actually sign-in to OCS.
Enable User Accounts
Open the Active Directory Users & Computers snap-in and locate an OU with users.
Select the user accounts and right-click, then choose Enable users for Communications Server.
Note: These options won’t actually be present in ADUC unless you’re using a server that has the OCS 2007 console installed. You might want to install the admin console on any machine you’re planning on managing OCS users from.
The Enable Office Communications Server Users Wizard opens. Press Next.
Select to assign users to the tap-ocs-2k7.ptown.com pool.
Select a format for the user SIP URIs. The firstname.lastname@confusedamused.com format is a good choice. If Exchange is installed in your organization you would probably choose the Use user’s e-mail address option for consistency.
The wizard should succeed and generate the SIP URIs. Press Finish.
Now just install Office Communicator on a client PC and try to sign-in.
Note: If you’re on a domain machine logged in with the account you’re trying to access in OCS all you should need to enter is your SIP URI. If you’re accessing a different account you’ll be prompted for your domain credentials. You can enter them in either format, but remember it’s your internal domain URI in this case. So for example, if you’re logged on to a PC as Roger Daltrey, but you enter mick.jagger@confusedamused.com as your SIP URI you’ll be prompted for your username and password. You could enter the username as either PTOWN\mick.jagger or mick.jagger@ptown.com. I’d recommend the former because giving users two different URIs is likely to be confusing unless your internal and external domain names are the same.


![clip_image002[5]](https://confusedamused.com/wp-content/uploads/2023/02/clip-image0025-thumb1.jpg)
![clip_image004[5]](https://confusedamused.com/wp-content/uploads/2023/02/clip-image0045-thumb1.jpg)
![clip_image006[5]](https://confusedamused.com/wp-content/uploads/2023/02/clip-image0065-thumb1.jpg)
![clip_image008[5]](https://confusedamused.com/wp-content/uploads/2023/02/clip-image0085-thumb1.jpg)
![clip_image010[5]](https://confusedamused.com/wp-content/uploads/2023/02/clip-image0105-thumb.jpg)
![clip_image012[5]](https://confusedamused.com/wp-content/uploads/2023/02/clip-image0125-thumb1.jpg)